Agent Management
Learn how to access the Administration panel, create agents, and manage them in Lexia.
Agent Management allows administrators to create, configure, and maintain AI agents used across departments or projects. This article explains how to access the Administration view, add a new agent, and manage existing ones.
1. Overview
Before You Begin
Users must have administrator access to create or manage agents. If you don’t see the Administration section in the sidebar, switch to Admin Mode from your profile menu.
Access Admin Mode
Step 1: In the upper‑right corner of the Lexia interface, click your Profile icon and select Admin Mode from the dropdown menu.
Step 2: Once in Admin Mode, find the Administration section in the left navigation menu.
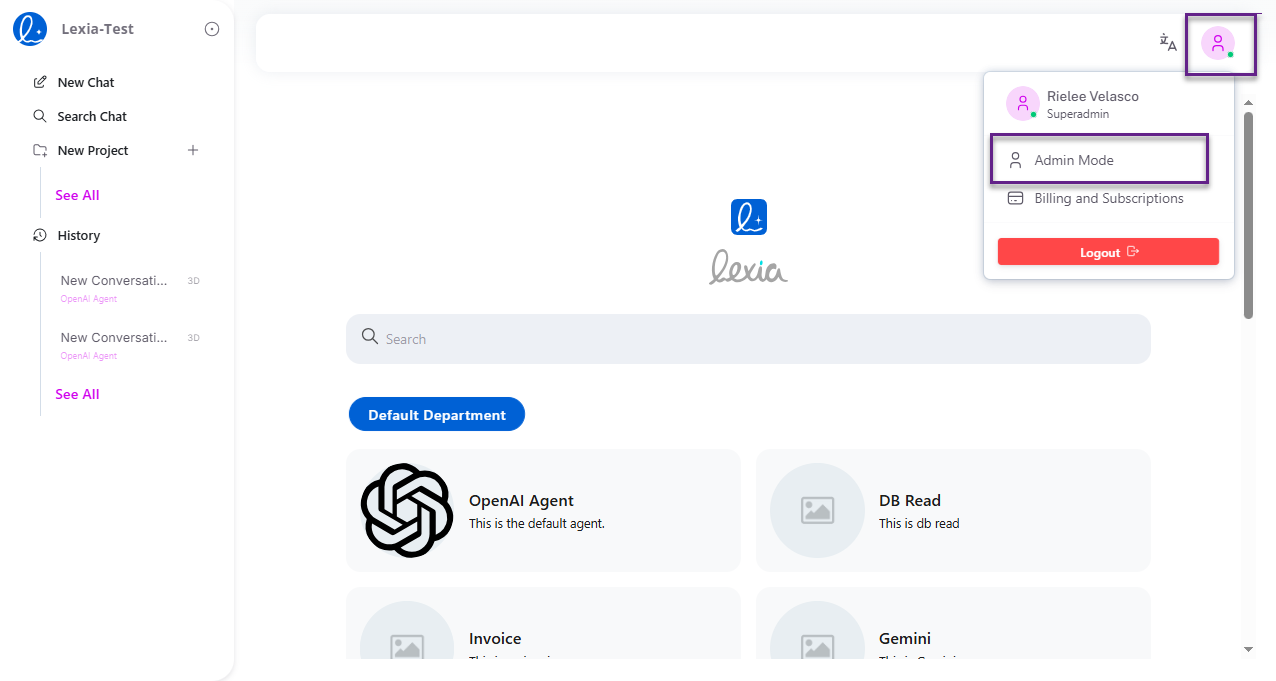 Open your profile menu and switch to Admin Mode
2. Create & Configure Agents
Create agents from the Administration panel and configure the key settings that define how they behave.
Step 1: Go to Agents under the Administration section.
Step 2: Click Add Agent in the upper‑right corner.
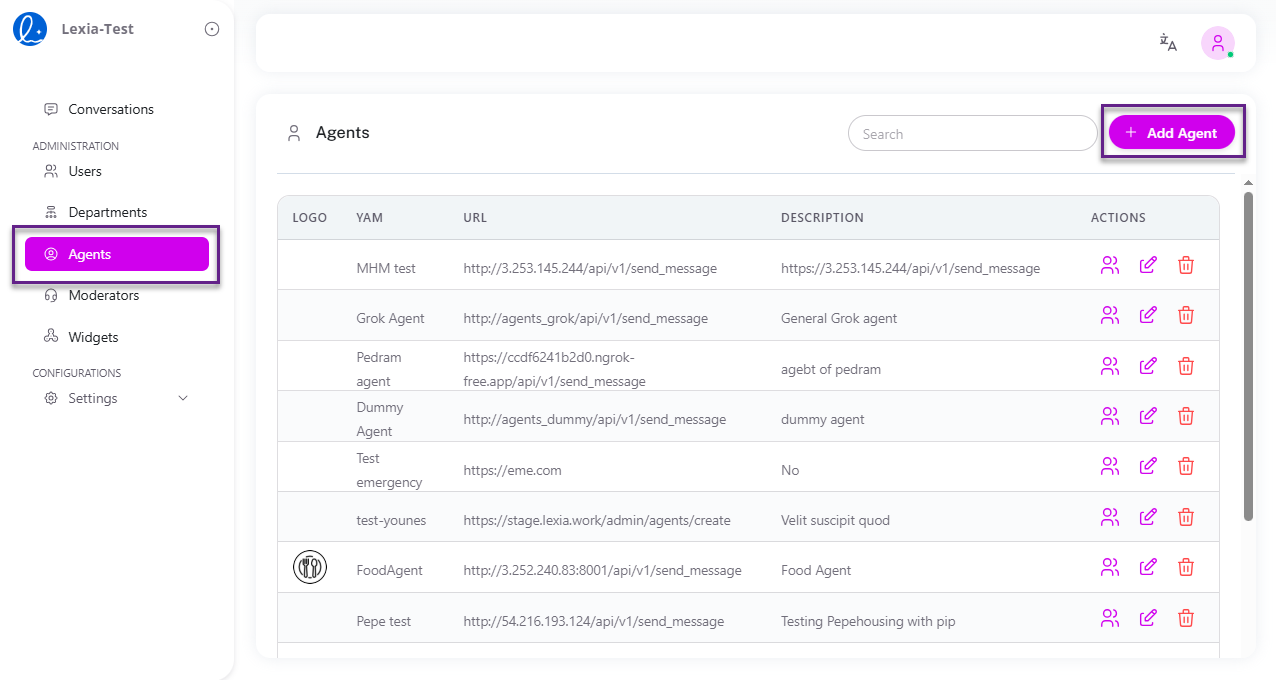 Agents table with Add Agent button
Step 3: Fill in the required fields:
| Field | What it means | Where it affects |
|---|---|---|
| Logo | Image shown for the agent (JPG/GIF/PNG, up to 800 KB) | Agents table and UI placements |
| Yam | Agent name/slug used internally | URLs, listings, references |
| URL | Endpoint the platform calls to send messages | Runtime routing to your agent service |
| Document URL | Link to related docs/KB | UI links, retrieval components |
| Description | Short summary of the agent | Tables, menus, search |
| First Message | Initial greeting in new conversations | First turn of chat |
| Moderator Active | Apply a moderator policy to this agent | Safety checks and status per agent |
| Memory/Search/Analysis Active | Enable memory, search tools, or analysis chains | Conversation context, tools usage |
| System Message | Instruction that governs agent behavior | Every response tone and policy |
| Models & Variables | Model mapping and environment variables | Model selection and parameterization |
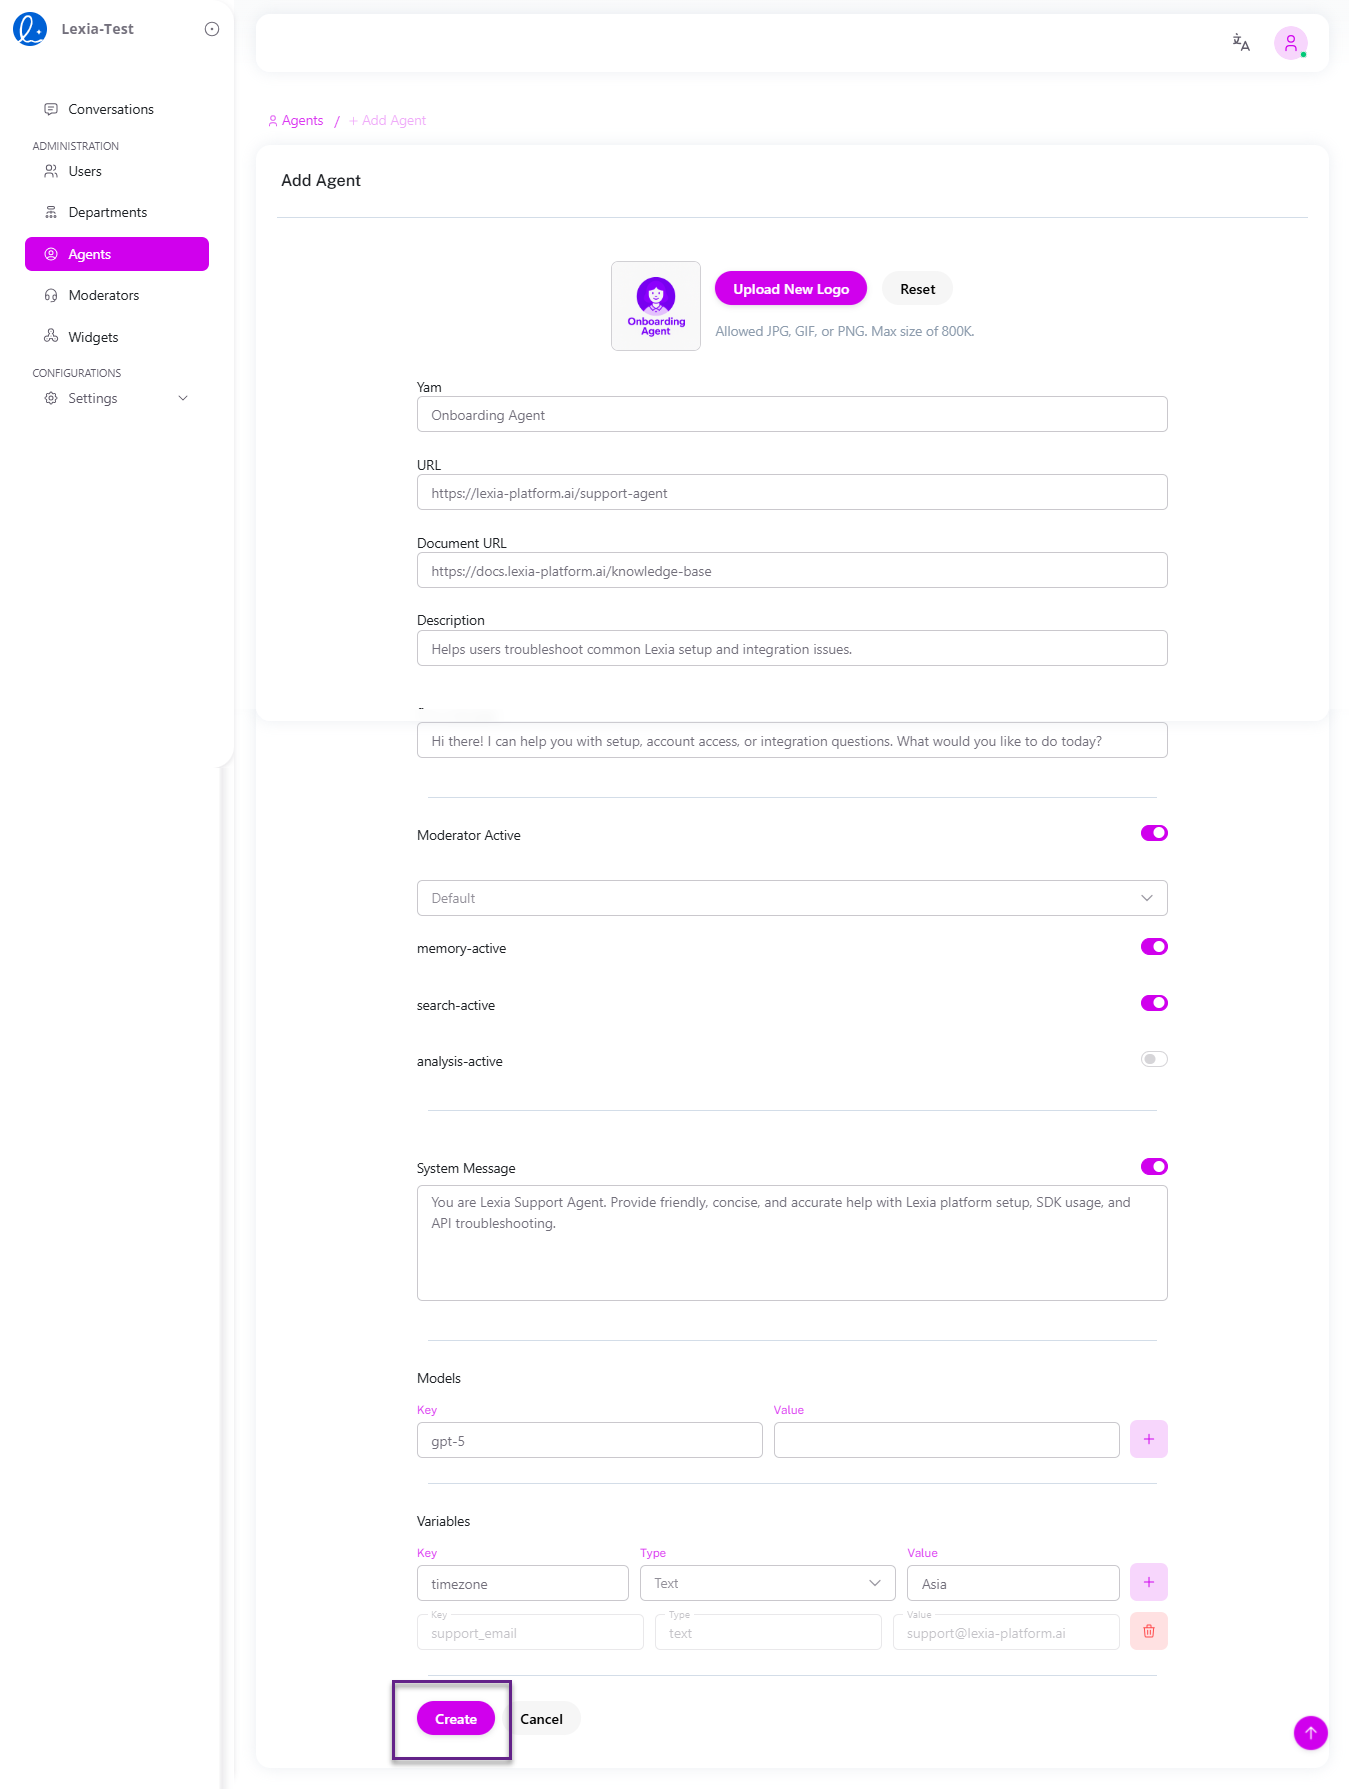 Add Agent form showing key fields
Step 4: Click Create to save the agent. After saving, the agent appears in your Agents list.
3. Viewing & Managing Agents
Once created, all agents are listed in the Agents table with each agent’s Logo, Name (Yam), URL, Description, and Actions.
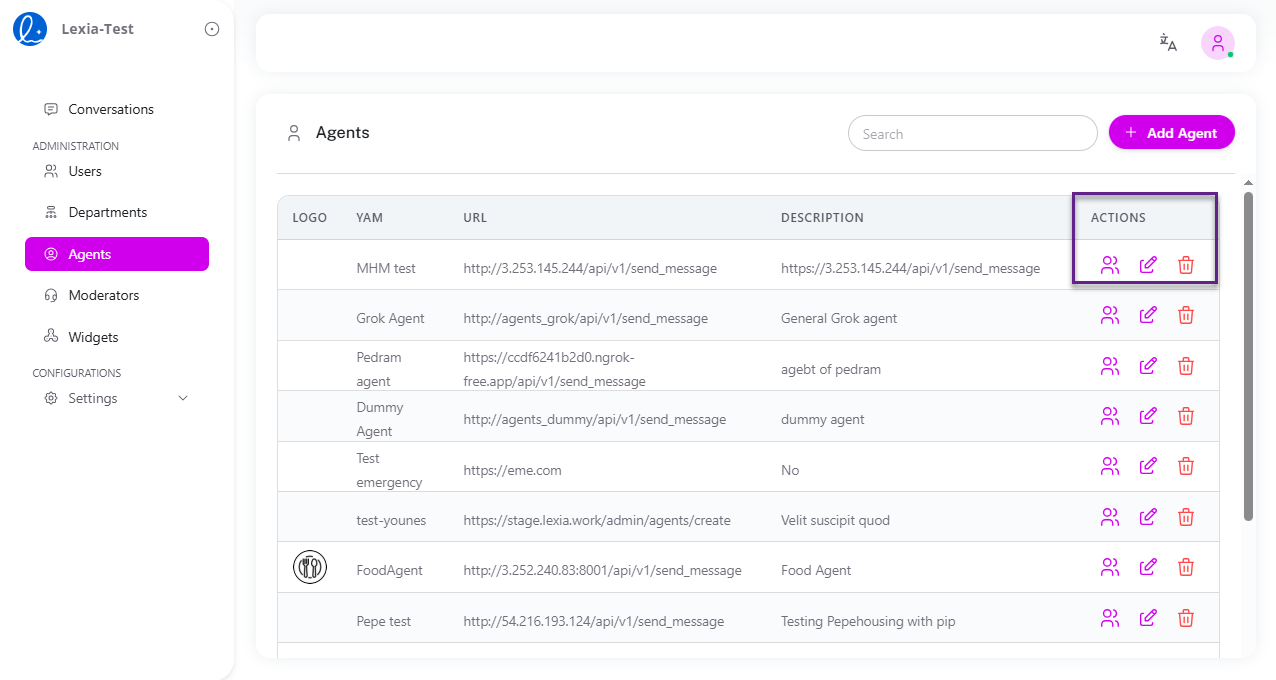 Assign users, edit, or delete from the Actions column
Actions
Each agent row includes three action icons:
- Assign Users — Click the 👥 Assign Users icon to control who can access the agent by assigning it to specific departments (all department members gain access) or individual users. For detailed instructions, see Access Management - Agent-Level Access Control.
- Edit — Update configuration details
- Delete — Remove the agent from your workspace