Access Management
Lexia’s Access Management system controls how users, departments, and agents interact within a workspace. It uses role-based permissions to define who can view, edit, or deploy agents and data.
 Image: Departments management page showing the clean interface with search functionality, department list, and action buttons for user assignment, editing, and deletion
1. Overview
Access Management links users and agents through Groups such as Departments, Teams, or Projects.
- Users are assigned to logical groups (e.g., Department, Team, Project)
- Agents are assigned to those groups and/or to specific users
This forms the core of authorization: a user can access an agent if they belong to a group that the agent is assigned to, or if the agent is assigned directly to that user.
With this model you can:
- Restrict sensitive agents to a specific group (e.g., Finance)
- Assign agents directly to individuals for one‑to‑one access (e.g., CFO)
- Combine both (group + specific users) for nuanced control
You still retain role-based permissions (Admin, Editor, Viewer) to govern what actions a user can perform once they have access. SSO and auditing complement these controls.
All settings are managed under Lexia Dashboard → Admin Mode → Access Management.
2. Roles & Permissions
Lexia uses a role-based access control (RBAC) model.
Each user is assigned a role that determines what they can do in the workspace.
| Role | Permissions | Typical Use |
|---|---|---|
| Admin | Full workspace access: create, deploy, delete, manage users | Workspace owner, CTO |
| Editor | Create and modify agents, view logs, limited deployment | Developer, Product Lead |
| Viewer | Read-only access to dashboards and reports | Operations, QA |
| Restricted | Access limited to assigned agents only | Contractors, interns |
3. Department & Team Access
You can group users by departments or teams (also called groups) to simplify large workspace management. Lexia provides a comprehensive department management interface accessible through Administration → Departments.
Creating Departments
Step 1: Navigate to Administration → Departments in the sidebar.
Step 2: Click the + Add Departments button to open the creation form.
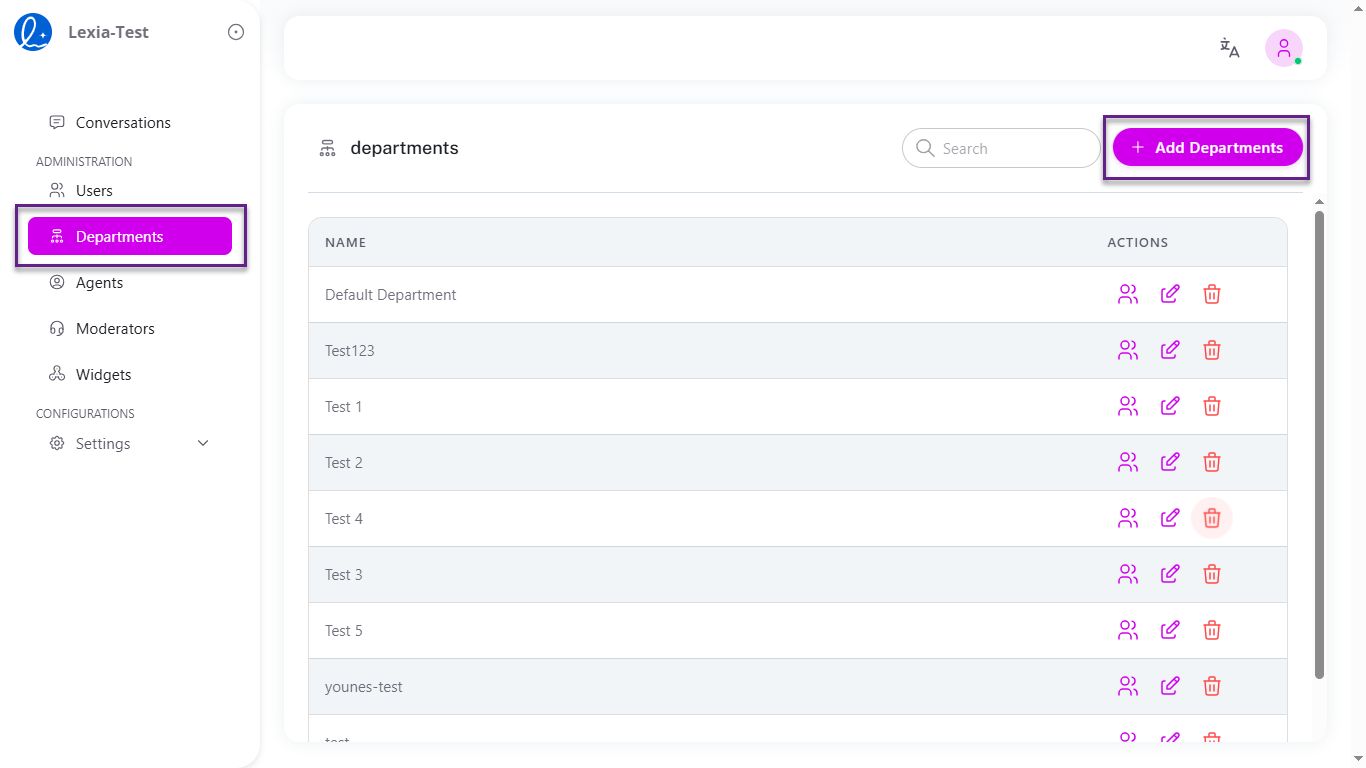 Image: Department creation form showing the name field and Create button
Step 3: Enter the department name in the name field.
Step 4: Click Create to save the department.
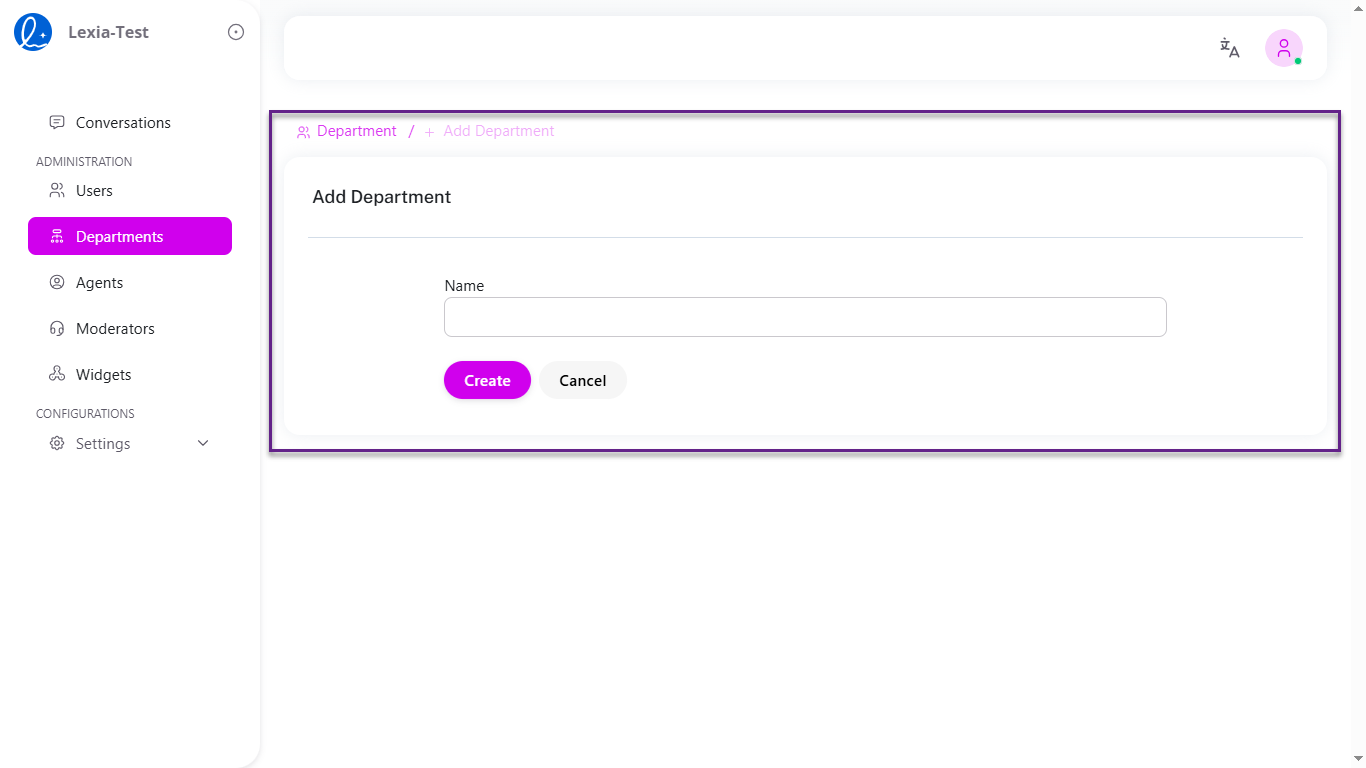 Image: Confirmation of department creation and updated department list
The new department appears in the departments list and is ready for user assignment.
Assigning Agents to Departments (Core Authorization)
Important: Assigning an agent to a department/group is the core of the authorization model. Members of that department automatically gain access to the agent.
Step 1: Open Administration → Departments and select a department.
Step 2: In the department details, open the Agents tab or section.
Step 3: Click + Assign Agent to Department and choose one or more agents.
Step 4: Click Save. All users in this department now have access to the assigned agents.
Example:
Department: Finance
Assigned Agents: finance-bot, expense-approver
Members: CFO, Controller, AP Specialist
Result: All Finance members can access these agents.
Assigning Users to Departments
Step 1: Click the 👥 Users icon next to any department to open the Department / Users view.
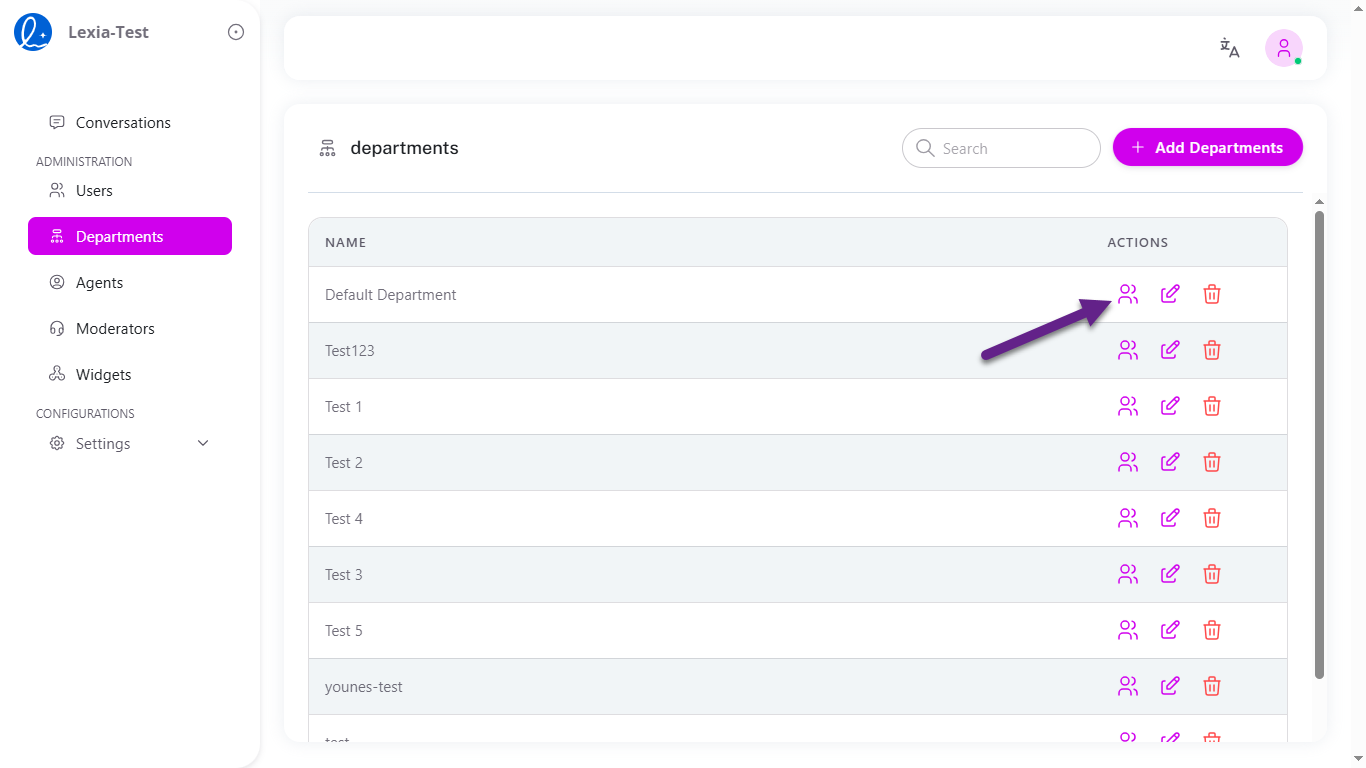 Image: Department users view with the + Assign User To Department button
Step 2: Click the + Assign User To Department button to open the Add User to Department modal.
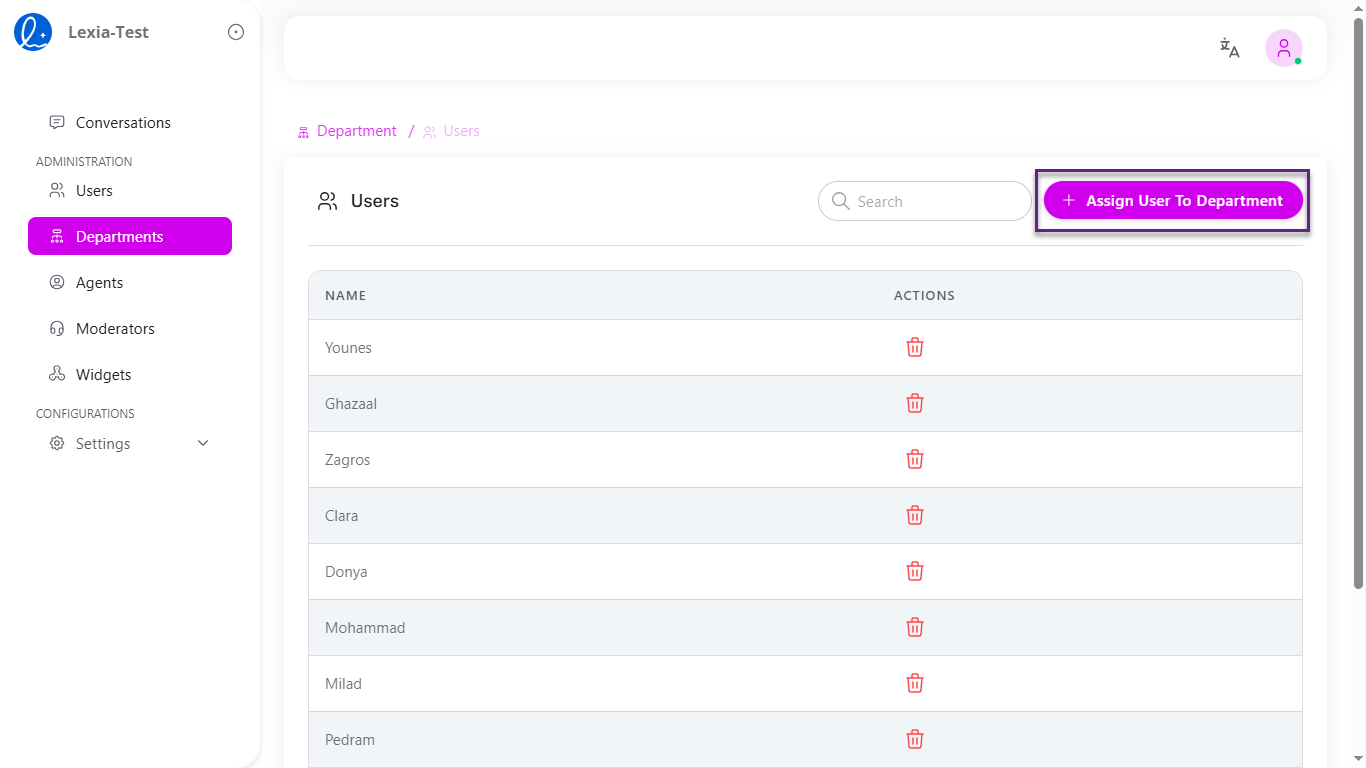 Image: Add User to Department modal with user selection field
Step 3: In the Select Users field, choose the users you want to assign to the department.
Step 4: Click Save to complete the user assignment to the department.
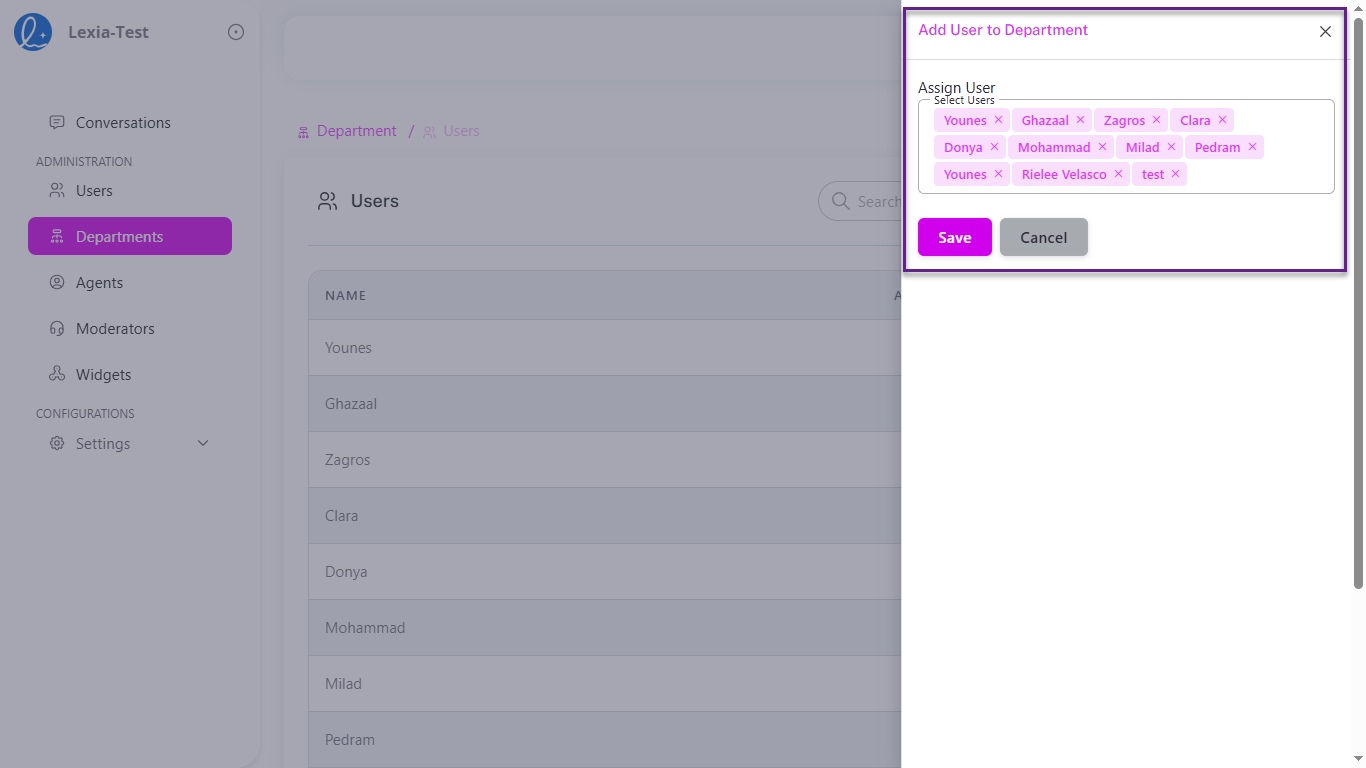 Image: Confirmation of user assignment with updated user list
Selected users will appear as tags with x icons that allow you to remove them if needed.
Managing Department Users
Viewing Department Users:
- Navigate to the Department / Users view to see all assigned users.
- You can see all users currently assigned to the department.
- Each user entry shows their name and available management actions.
Removing Users:
Step 1: Click the 🗑️ trash icon next to any user you want to remove.
Step 2: Confirm the deletion in the confirmation dialog that appears.
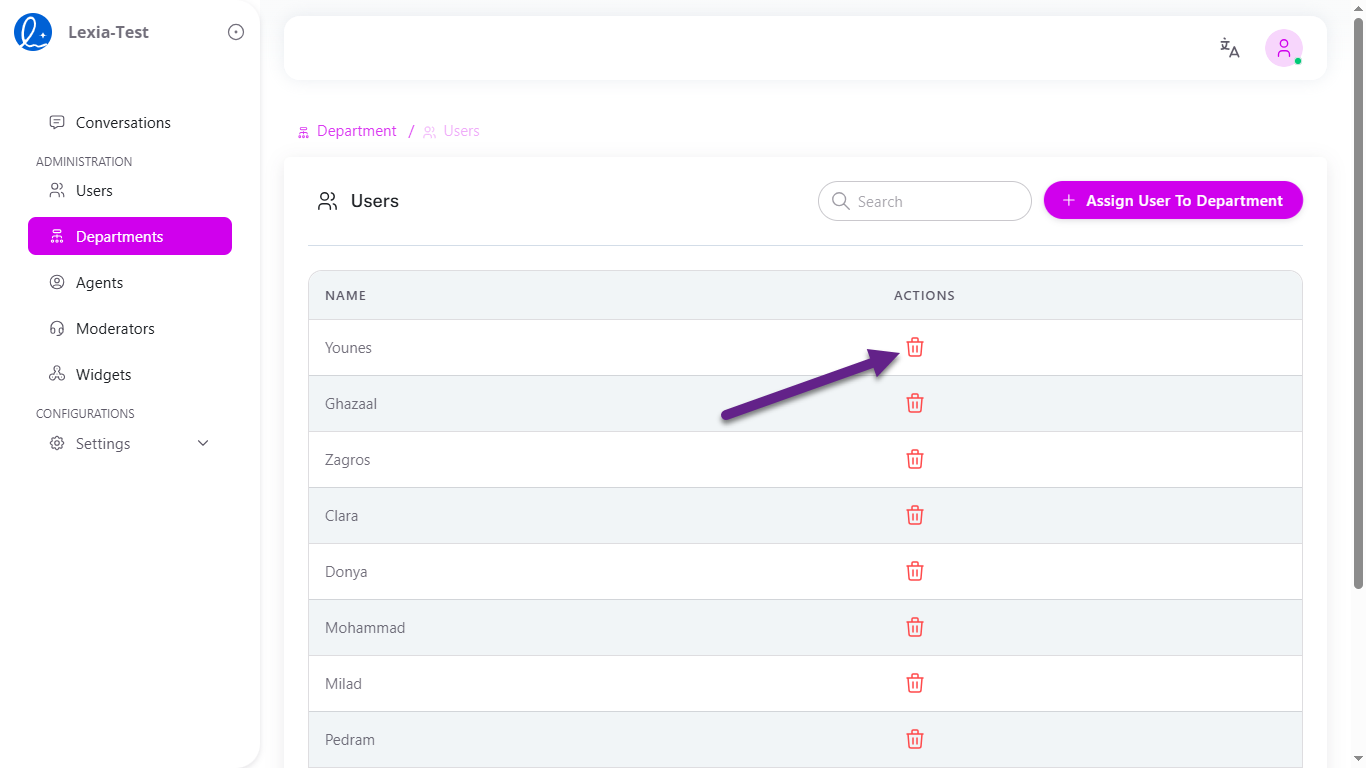 Image: User removal confirmation dialog and updated user list
The user will be removed from the department.
Editing Departments
Step 1: Click the ✏️ edit icon next to any department you want to modify.
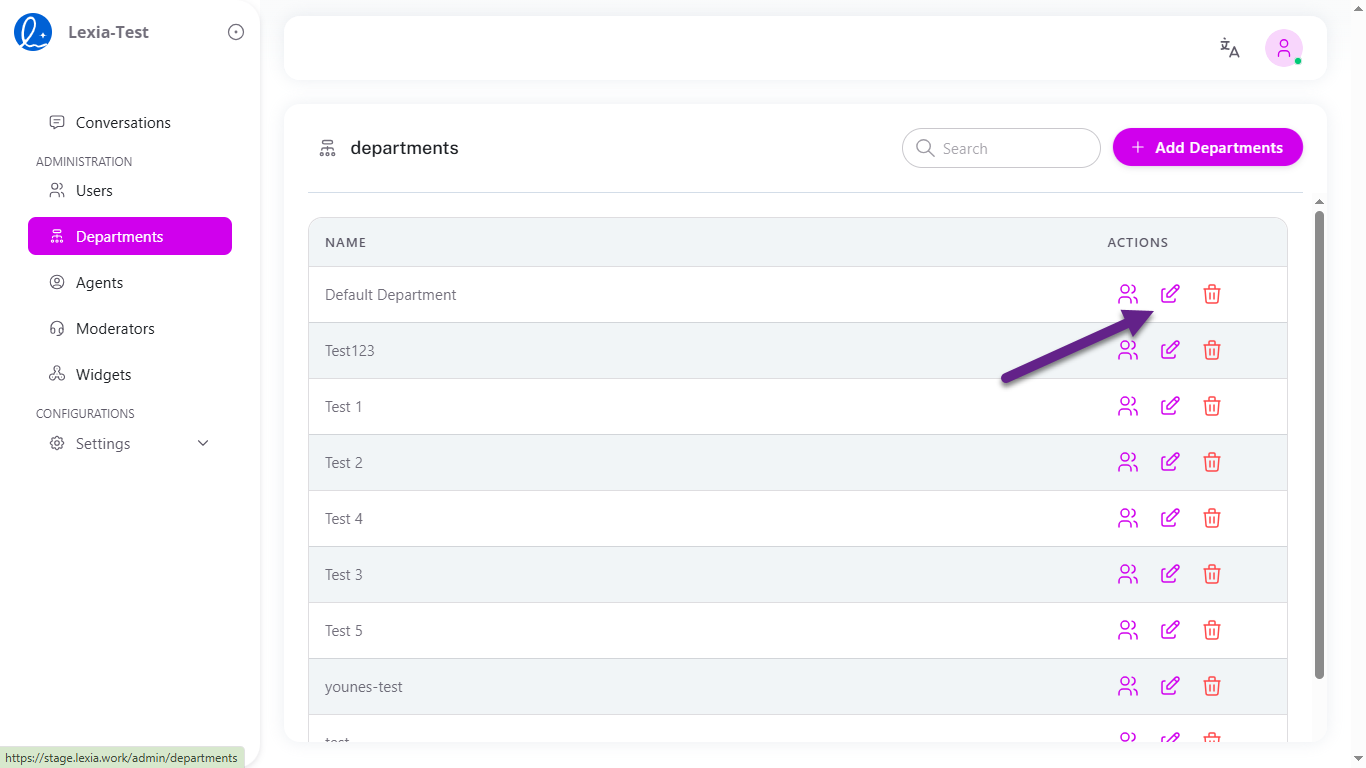 Image: Department list with edit icon highlighted
Step 2: Update the department name in the name field as needed.
Step 3: Click Save Changes to update the department with your modifications.
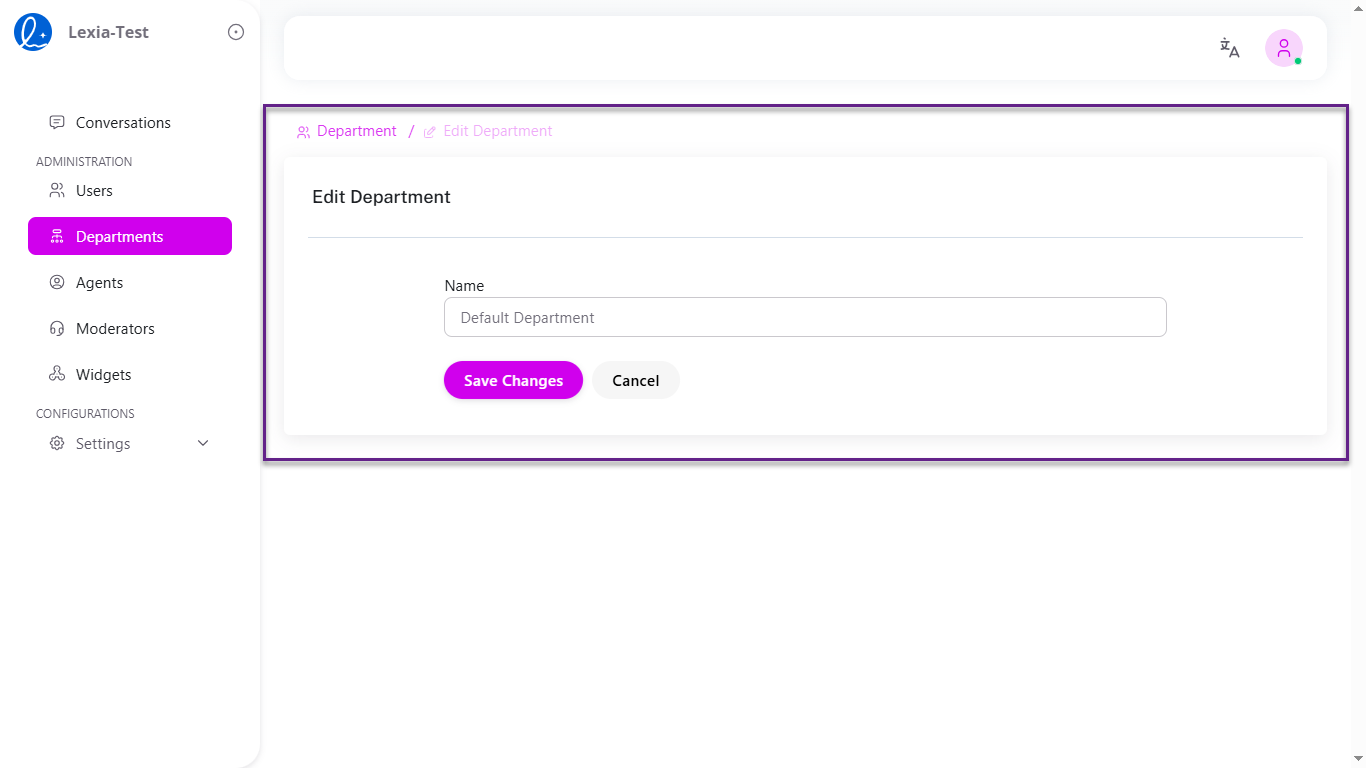 Image: Edit Department modal with name field and Save Changes button
The Edit Department modal will open with the current name pre-filled. You can alternatively click Cancel to discard any changes and close the modal.
Deleting Departments
Step 1: Click the 🗑️ delete icon next to any department you want to remove.
 Image: Department list with delete icon highlighted
Step 2: Review the warning message: Are you absolutely sure you want to delete this record?
Step 3: Click Yes, Delete to permanently remove the department.
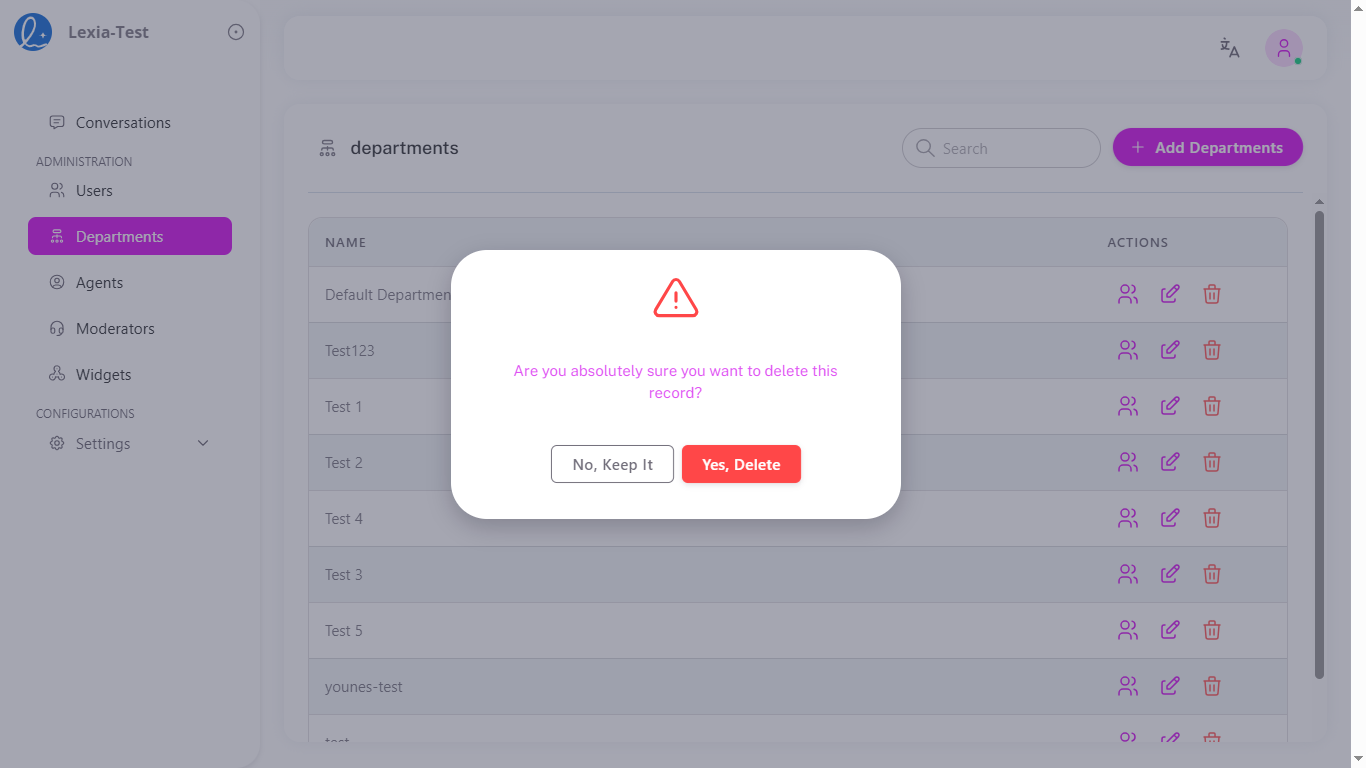 Image: Delete confirmation dialog with Yes, Delete and No, Keep It options
A confirmation dialog will appear asking for confirmation. You can alternatively click No, Keep It to cancel the deletion and keep the department.
Warning: Deleting a department will remove all user assignments and may affect access permissions.
4. Agent-Level Access Control
Use agent-level controls for sensitive or experimental agents. There are two ways to grant access:
- Assign agents to Groups (Departments/Teams/Projects) — members inherit access
- Assign agents directly to specific Users — optional, can be combined with groups
Effective access:
- A user can access an agent if they belong to any assigned group, or if the agent is assigned to them directly
- Admins retain override rights
Example:
Agent: finance-bot
Groups: Finance
Direct Users: CFO ([email protected])
Result: Finance members and the CFO can access finance-bot.
Accessing Agent-Level Access Control
Step 1: Click on your profile icon in the top right corner and select Admin Mode.
Step 2: Under Administration, select Agents from the sidebar.
Step 3: Locate the agent you want to configure and click the 👥 two-person icon in the Actions column.
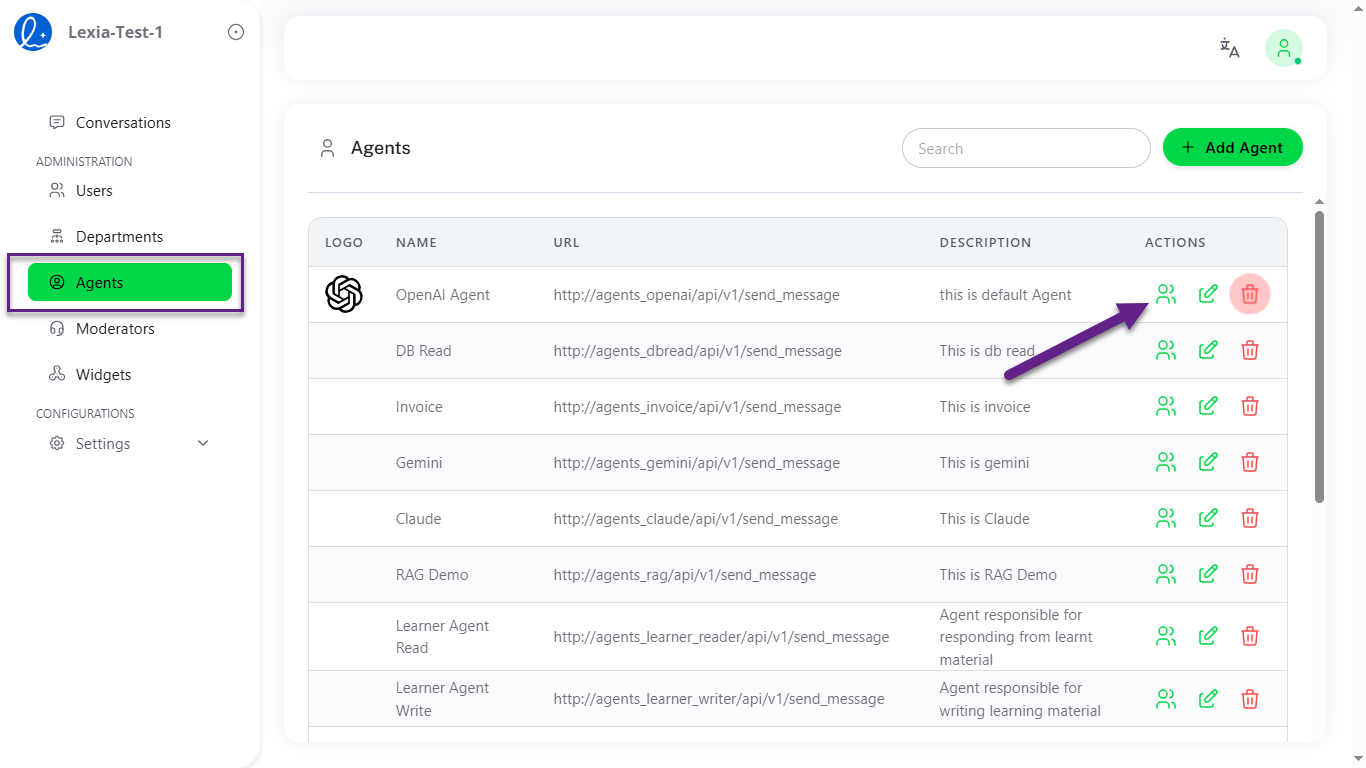 Image: Agents management page showing the agents table with logo, name, URL, description, and actions columns including the access control icon
Assigning Users and Departments to an Agent
Step 1: In the Agent Users view, click the + Assignment button.
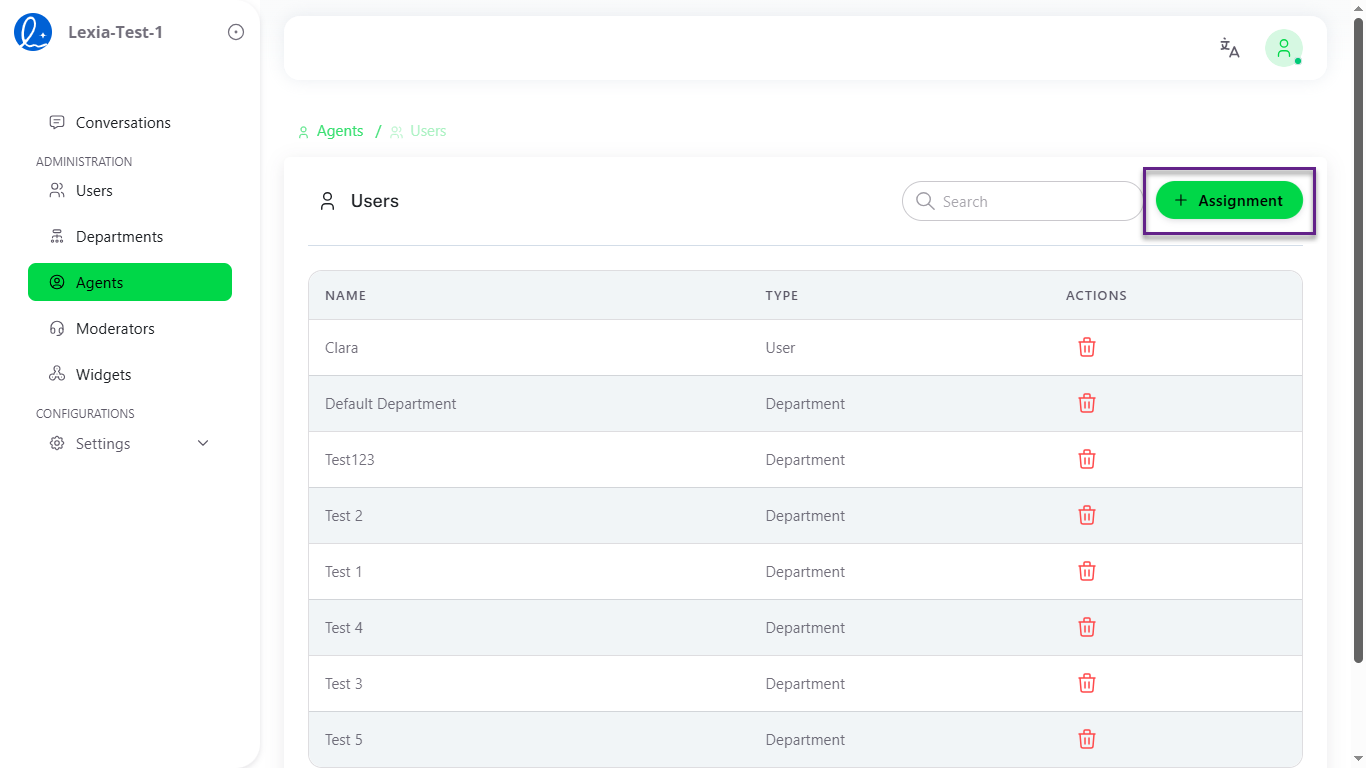 Image: Agent-level access control view showing the users and departments currently assigned to the agent, with search functionality and assignment button
The Add User and Department to Agent opens.
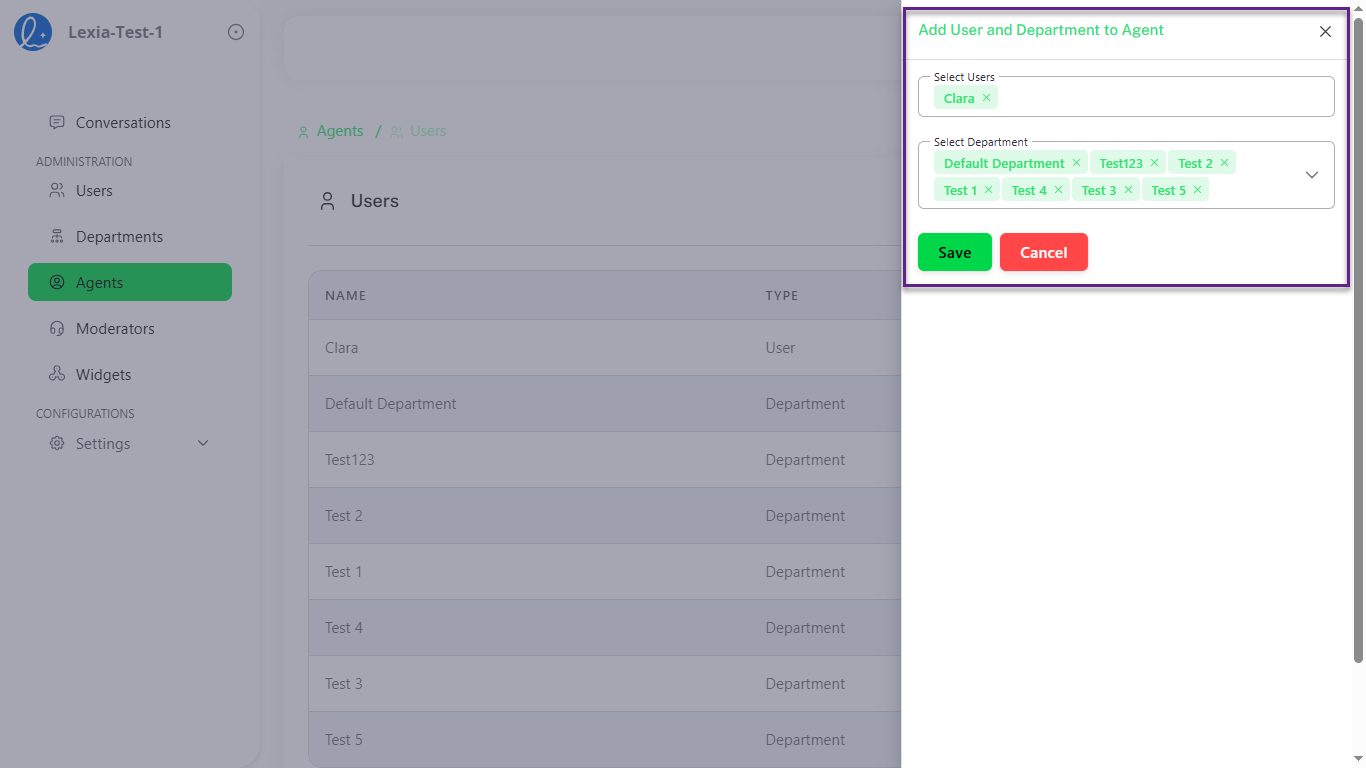 Image: Modal dialog for adding users and departments to an agent, showing select fields with selected users and departments displayed as tags
Step 2: In the Select Users field, choose the users you want to grant access to this agent. In the Select Department field, choose the departments whose members should have access.
Selected users and departments will appear as green tags with X icons that you can remove if needed.
Step 3: Click Save to apply the access control settings.
Removing User or Department Access
Step 1: In the Agent Users/Departments view, click the 🗑️ trash icon next to any user or department you want to remove.
Step 2: The user or department will be immediately removed from the agent's access list.
Note: Changes take effect immediately. Users who lose access will no longer be able to interact with the agent in conversations or through the dashboard.
5. SSO & Authentication
Lexia supports Single Sign-On (SSO) integration for centralized identity management.
Supported providers:
- Google Workspace
- Microsoft Entra ID (Azure AD)
- Okta (via SAML 2.0)
To configure:
Step 1: Go to Dashboard → Access Management → Authentication
Step 2: Upload SSO metadata or connect provider
Step 3: Assign default roles for SSO users
SSO sessions respect all role and department rules automatically.
6. Access Auditing
Every change to access configuration (role assignment, revocation, group edits, agent assignments) is logged automatically.
Audit data includes:
- Action type (add/remove/modify)
- Target (user, role, group/department, agent)
- Admin who performed it
- Timestamp and environment
Audit logs are immutable and can be exported via Interaction Logs or Data & Retention.